Discovering that your glass aquarium is leaking is a hobbyist’s worst nightmare! The quality of the tank water will suffer, the lives of your fish and other aquatic pets will be endangered, and you could be faced with the prospect of having to buy a whole new tank.
Your heart sinks as you consider the prospect of taking down your carefully aquascaped tank, ripping off all the old silicon sealant, and attempting to put it all back together after 24 to 48 hours. In the meantime, you’re fretting over where to store your fish and how to keep them safe and thriving.
I feel your pain because that’s exactly what happened to me in the early days of my fishkeeping journey.
In this article, I share with you how to fix your leaky tank with and without completely taking it down!
Why Do Aquariums Leak?
On average, a glass aquarium should last ten years or more.
However, they do wear out and generally leak when the silicone sealant in the joint areas and seams is torn, damaged, or worn out. Silicone is used to connect the glass viewing panes of the tank, basically creating the enclosure and stopping leaks from the spaces at the seams.
When the sealant becomes weak, broken, or worn, water can leak or trickle out of the tank, so you need a good fix to keep it under control.
How To Tell if Your Aquarium Is Leaking
When my tank sprung a leak, I first noticed white calcium stains on the glass at the top left-hand corner, but it’s not always that easy to spot a leak.
- Keep an eye on the water level. If your tank leaks, the water level will drop below that spot and stay that way. So, you’ll need to check carefully for breaks or damage to the sealant slightly above the water level.
- If you can’t spot the leak, try adding more water to the tank to increase the level. Wrap a piece of kitchen towel around the sealant and watch closely to see where the towel gets wet. That’s the leaky spot.
- Once you’ve found the leak, mark the tank with a marker pen or a piece of tape.
How To Fix the Leak
As mentioned earlier, there are a couple of approaches to take when fixing a leaky aquarium.
First, turn off the electricity. If there’s even a remote chance that water can come into contact with the power supply, turn off the electricity supply to the tank. You could easily get an electric shock if a cable comes into contact with a puddle of water or even a small leak.
What You’ll Need:
There are several ways of fixing a leaky fish tank, but you’ll need the following supplies for them:
- Painter’s tape
- Caulk gun
- Blades
- Aquarium sealant
- Soft cloth or paper towels
- Superglue
- Acetone
- Baking soda
Fixing the Tank by Draining
If the leak is at the bottom of the tank, I recommend draining the aquarium completely. Although that’s a hassle, it does make it much easier to fix the leak.
Preparation
Unfortunately, you’ll need to siphon out all the water and remove the substrate, plants, equipment, décor, and all the livestock. I know that’s a pain, but at least your tank will get a thorough clean during the process!
Transfer the fish to a temporary holding container or quarantine tank while you fix the aquarium. I had to do that one time, and my fish and shrimp were fine. Just ensure the water temperature is correct for the fish and the chemistry is balanced. Of course, the easiest way to do that is to transfer water from your existing tank.
Remove Old or Damaged Sealant
Damaged or old sealant is the cause of the leak, so you’ll need to scrape that off the tank glass. I use a razor blade scraper for that job, taking care not to scratch the glass. Work from the edges of the sealant towards the center.

Aquascape Black Silicone Sealant, 10.1 oz
Check Price on AmazonDon’t use sharp tools that could damage the seams or the good sealant, or you could leave yourself with a whole lot more work to do!
If you have an acrylic tank, use a plastic blade to prevent damaging or scratching the tank.
You’ll need to remove all the old sealant since it might not bond well with the new stuff, so it’s best to get rid of all the original stuff. Take care not to damage the seam between the two glass panes! It’s only the silicone that’s leaking, not the seam.
Clean the Glass
Now, you need to clean the glass after removing the old sealant. If you don’t clean the glass properly, the new silicone won’t stick firmly, and you could result in another leak.
The easiest way to do that is to smear a small amount of acetone on a soft cloth and use it to clean the area.
Protect and Mark the Tank’s Edges
Use painter’s tape or something similar to mark the tank seams and give you a straight-line finish when applying the new silicone. Use two strips of tape per seam, leaving roughly ?” between the tape and the glass on each side.
Apply the New Sealant
Use only aquarium-safe silicone to fix leaks!
Use a caulk gun to apply your new aquarium silicone to the leaky area. Apply the silicone to the inside of the tank, as that’s longer-lasting and more effective. Don’t get carried away and use too much sealant, as that could ruin the seal, and curious fish might chew it.

Amazon Basics Heavy Duty Caulking Gun 310ml
Check Price on AmazonOnce the sealant is applied and before it has a chance to cure, use your fingers, a caulk tool, or a piece of flat plastic to smooth the silicone evenly along its length. Now, carefully remove the painter’s tape.
Allow the Sealant To Dry
Check the manufacturer’s instructions on the product label to find out how long it takes for the sealant to cure. I recommend allowing a bit longer than that to be sure it’s completely dry before refilling your tank.
Refill the Tank and Check for Leaks
Once you’re sure the silicone is dry, you can refill your tank with clean, dechlorinated water. Fill the aquarium past the leaky area, and allow it to sit for at least 24 hours until you’re sure the leak is fixed.
Now, you can reintroduce the fish and other inhabitants to your tank.
Fixing a Leak Without Fully Draining the Tank
Provided the leak is above the water level, you might only need to remove some of the water rather than the whole lot. Use a clean container to remove enough of the water to allow you to work on fixing the leak.
When fixing my leaky tank, I used a blade to scrape an inch or so off the leaking area of sealant. I then applied a thin bead of fresh aquarium silicone sealant around the area where the two glass panes joined to reinforce the join. I then left around 48 hours for the sealant to go off before topping up the tank again with fresh, dechlorinated water.
Fixing a Leak Without Draining the Tank at All
Usually, it’s impossible to fix a leaky tank without removing some or all of the water. That’s a big problem for many of us since we don’t have another tank set up to transfer our livestock into, and a brand new tank is often out of reach of many hobbyist’s budgets.
That said, provided the leak is very small, it is possible to fix it without removing too much of the water. This method works best if the leak is at the lower level of the tank, the fix is almost instant, and you don’t have to wait 24 hours for the adhesive to cure.
You need a tube of thin superglue and some baking soda to do this fix. Note that the glue must be the consistency of water or very close to that.
- Start by sprinkling baking soda onto the leak
- Use super glue on the leaky spot.
- The baking soda absorbs the glue, drying it almost instantly.
- Repeat the process several times to create three to five layers.
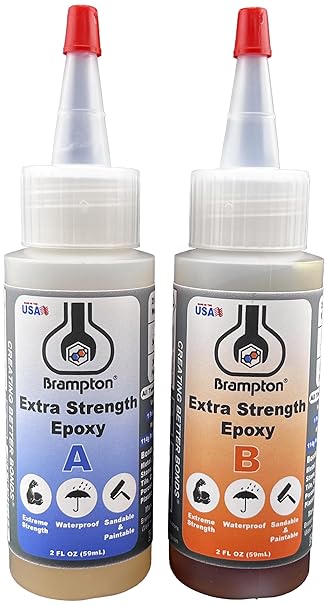
Brampton 20-Minute Waterproof Epoxy Glue Kit
Check Price on AmazonThe composite bond you create is incredibly strong and should quickly stop a minor leak. That said, I still recommend draining some water to leave the leaky spot clearly visible above the water, although, with this repair method, you can refill the tank almost immediately.
In addition, glue doesn’t expand and contract like silicone sealant, so if the temperature changes drastically, there is a risk of cracking the glass. For that reason, this fix should only be used in case of emergency, and you should repair the tank properly as soon as possible.
Can You Fix Broken Aquarium Glass?
If the tank is actually cracked, that’s a more serious problem. Unfortunately, cracks spread quickly under the pressure and weight of the water in the aquarium. So, a tiny chip can rapidly spread along the whole length of the glass.
For that reason, you’ll need to replace the cracked pane with a new one, although buying a new tank is recommended.
How To Prevent Aquarium Leaks
So, how can you prevent your aquarium from springing a leak?
Flat and Level Surface
The first thing to know is that you must put your tank on a flat, level surface with all four corners of the tank in contact with it.
If the aquarium is not level and one corner is not touching the surface, the tank’s frame will twist, creating pressure on the seams and causing leaks. Using a purpose-built aquarium stand is the best way to display your tank, but if you want to use a regular table, ensure it’s sturdy enough to take the aquarium’s weight and put some polystyrene tiles underneath the tank to ensure the surface is level.
Remember, one gallon of water weighs around 8 pounds. Therefore, a 100-gallon setup, including decorations, plants, substrate, and fish, can easily tip the scales at over 1,000! That’s a lot of pressure!
Don’t Move Your Tank With Water in It!
Never try to move your aquarium while it contains water or substrate. The pressure that is placed on the seams and sealant by doing so is massive and could cause more leaks.
Age of the Tank
As mentioned earlier, most fish tanks have a lifespan of around ten years, during which time silicone ages, potentially leaving you with leaks in a very old system. For that reason, you should beware of buying a secondhand aquarium and always go for a new one if you can afford it.
Test the Silicone
If you buy an old aquarium or yours has been around for a while, you can test the silicone.
Touch the silicone with your fingernails. If you can slide your nails under the silicone even slightly, that’s a pretty good indicator that the silicone is aging and could need replacement.
Final Thoughts
When I realized my main display tank was leaking, I immediately went into full panic mode! I had visions of the tank exploding, water pouring all over the living room floor, and my poor fish and inverts flapping around helplessly on the carpet at the mercy of my cats!
However, a leaky tank is not the end of the world, or the end of the tank, for that matter. It’s often possible to repair minor leaks without needing to empty all the water out of the tank.
That said, fish tanks typically have a lifespan of around ten years, and seals do get worn out and damaged over time. So, a major leak could mean it’s time to invest in a new one.